Do you use Eureka Math and teach first grade? Are you looking for innovative ways to enhance your math workshop and boost student engagement? Eureka Math, known for its rigorous and coherent curriculum, can be a valuable resource in achieving these goals. In this blog post, we’ll explore how you can seamlessly integrate Eureka Math into your math workshop, creating an enriching and effective learning experience for your students.
If you are using Eureka and want to “up your engagement” during your lessons, check out my blog post about my 10 ways to fit Eureka into my Math Workshop block! First of all, let me explain what Math Workshop is: it’s a framework with the “I Do, We Do, and You Do” for math! This is called the gradual release of responsibility. You have calendar time, a math mini-lesson, 4-5 stations, and then an exit ticket.
What Do We Need to Know About Eureka First?
*1. Understanding the Eureka Math Philosophy: Before diving into integration, it’s crucial to familiarize yourself with the philosophy behind Eureka Math. Understanding the curriculum’s key components, such as its emphasis on conceptual understanding, procedural fluency, and application, will guide your approach during the workshop.
**2. Aligning Units with Workshop Components: Eureka Math is organized into modules, each focusing on a specific concept or skill. Align these modules with your math workshop components, such as a mini-lesson, guided practice, independent practice, and reflection. This ensures a structured and cohesive learning experience for students.
**3. Launching with an Engaging Problem: Begin your math workshop with an engaging problem or scenario from Eureka Math. This sets the stage for the day’s learning and sparks curiosity. Whether it’s a real-world application or a challenging math puzzle, use it as a catalyst to introduce the day’s topic.
4. Mini-Lessons with Eureka Math: Utilize the Eureka Math materials for your mini-lessons. The curriculum often provides detailed scripts, visuals, and examples to support effective teaching. Tailor these resources to your students’ needs, focusing on the key concepts and strategies embedded in the lesson.
**5. Guided Practice and Collaborative Learning: During the guided practice phase, encourage collaborative learning. Eureka Math often includes opportunities for partner or group work. Use these exercises to foster peer-to-peer discussions, allowing students to share their thinking and learn from each other.
**6. Independent Practice with Eureka Worksheets: Assign independent practice using Eureka Math worksheets or problems. This reinforces the day’s lesson and provides students with an opportunity to apply what they’ve learned.
**7. Differentiation and Small Group Instruction: Eureka Math acknowledges the importance of differentiation. During your math workshop, create small groups based on students’ needs. Offer targeted instruction, using Eureka Math materials tailored to specific skill levels. This ensures that each student receives the support necessary for their individual progress.
**8. Math Games and Centers with Eureka Math: Enhance your workshop with math games and centers inspired by Eureka Math concepts. These activities add a fun and interactive element to the learning process, reinforcing skills in a playful context.
**9. Reflecting on Learning: End each workshop session with a reflection period. Have students articulate what they learned, what challenges they faced, and how they can apply these concepts in real life. Use exit tickets or journaling to gather insights into individual student progress.
**10. Building a Math Community: Foster a sense of community in your math workshop. Encourage students to appreciate the diversity of problem-solving approaches and celebrate each other’s successes. Eureka Math’s emphasis on discourse and collaborative learning aligns well with creating a positive math community.
How Do I Connect Them Together?
So, how do I do this you ask? Here are my 10 ways that I infuse both of them. I will go into more depth with each part with pictures, videos, and examples.
1.) Warm Up Using Calendar- use a Rekenrek to count forwards, backward, skip counting, and missing numbers.
2.) Use the learning goal as your math objective to introduce your lesson.
3.) Mini-Lesson- Use the YOUTUBE Module lessons to help guide your concept development- while students use their whiteboards.
4.) Problem of the Day- display on your smartboard and students use their whiteboards.
5.) Read Math Literature that goes along with your concept development.
6.) Use the Flash Fluency Pages as Independent Practices and inside your Math Tubs.
7.) Use Math Journals to reinforce your math lesson.
8.) Use Math Tubs to differentiate your math skills and to have a recursive review of old skills.
9.) Use the Concept Development lesson at your teacher table.
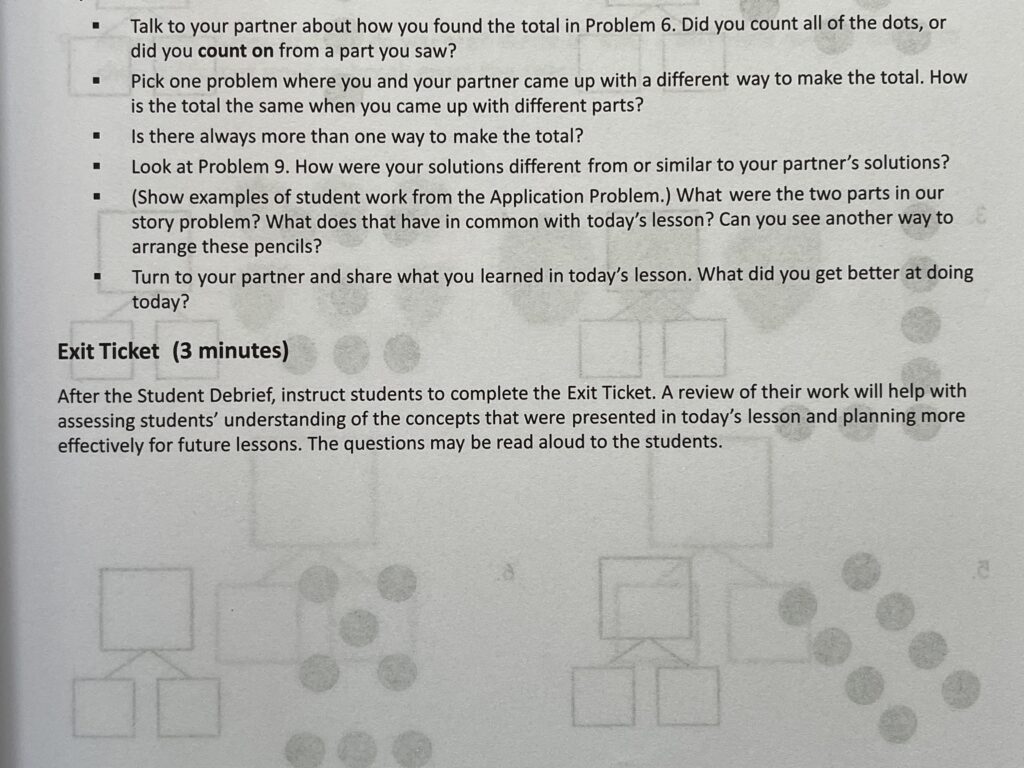
10.) Use the Exit Ticket- at the very end of your math block to see if your students understood the skill.
Let’s Break Down Each Component:
1.) Calendar
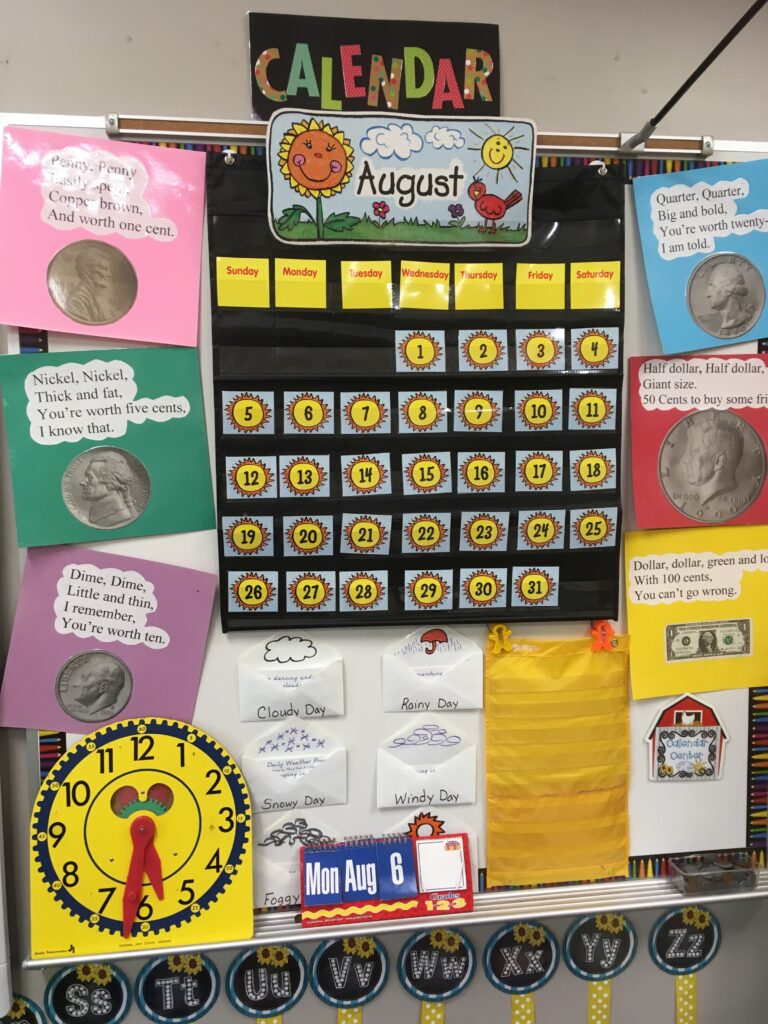
In my opinion, I believe that having a calendar routine as a warm-up is an excellent way to have a recursive review of year-long math skills- in a quick and stress-free environment. Check out my YOUTUBE video of how I teach my calendar routine here. If you watch until the end, you will notice that I use a Rekenrek to count forwards, backward, and skip counting.
Eureka math uses a Rekenrek to reinforce counting up and counting back and this tool is excellent to practice daily in your calendar. I also encourage my students to practice using their Rekenrek in their math tubs to practice these skills that we do in the calendar.
2.) Learning Goals
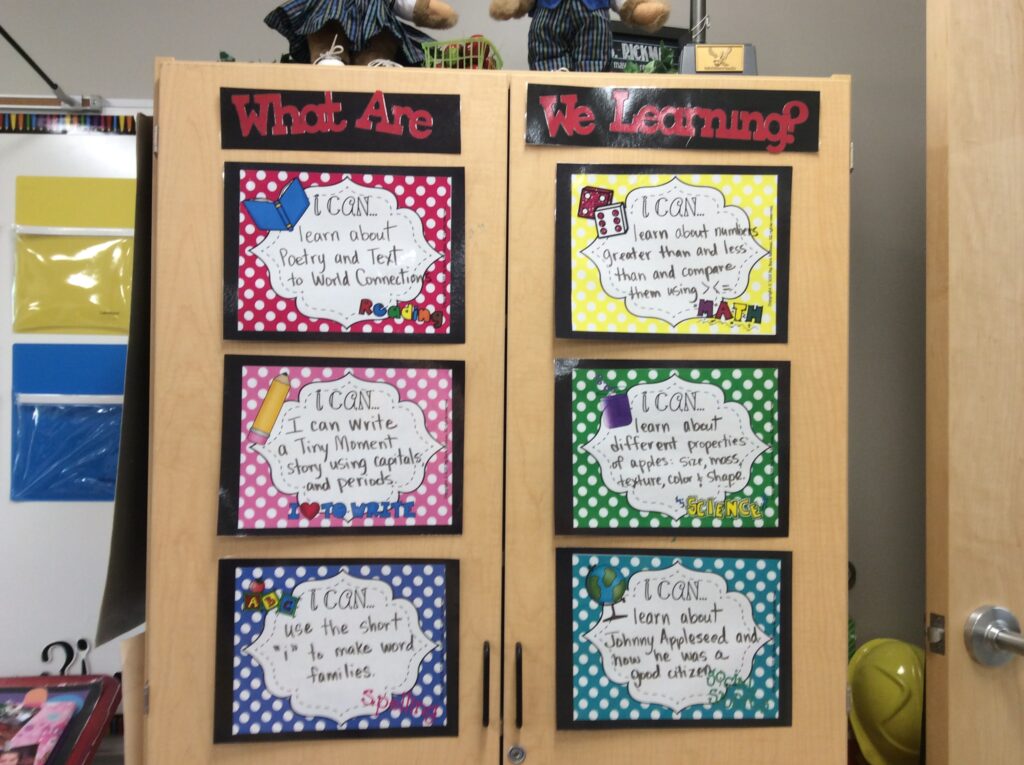
Always use your learning goals from Eureka Math to write your content and language objectives and even your closing questions for the day. I always read these objectives to my students and they repeat after me. We say the objectives again at my teacher’s table while I’m teaching the concept development. If you’re interested in my Objective cards, click here. I just change them out weekly with a dry-erase marker.
3.) Math Lesson- Eureka YouTube Videos
Every day, we watch a YouTube Video of our math lesson. My students LOVE watching these videos and they are so engaged with their whiteboards! Here is a YouTube Channel of Math lessons that we watch. They are fantastic! My students know that they cannot write anything on their whiteboard unless the video tells them to. This is also a great way for me to see how I can teach concept development at teacher table.
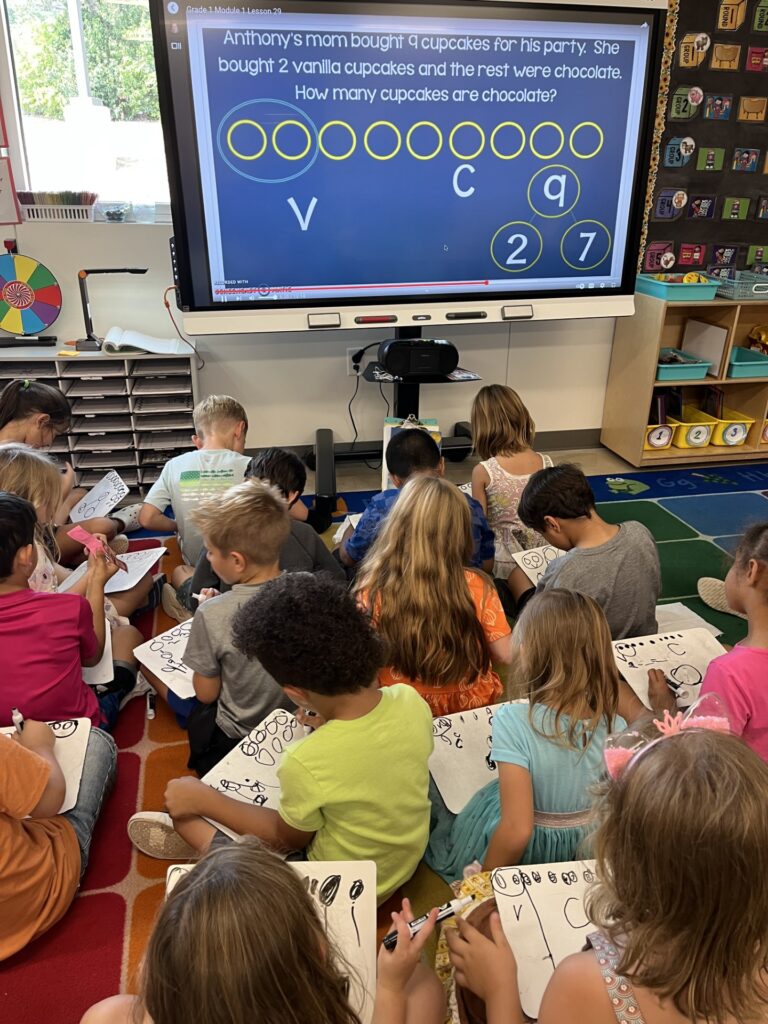
4.) Problem of the Day
Since my students already have their whiteboards in their laps, I just have them make a quick draw of the story problem of the day. I display the question on the smartboard and model how to make a quick draw. I call on students to come up to the smartboard to model how to solve the problem.
A quick draw are circles, instead of drawing the real picture, which takes too long. Drawing circles is much easier and quicker for the students to solve the problem. My students LOVE coming up to the smartboard to answer and see if they can get it right!
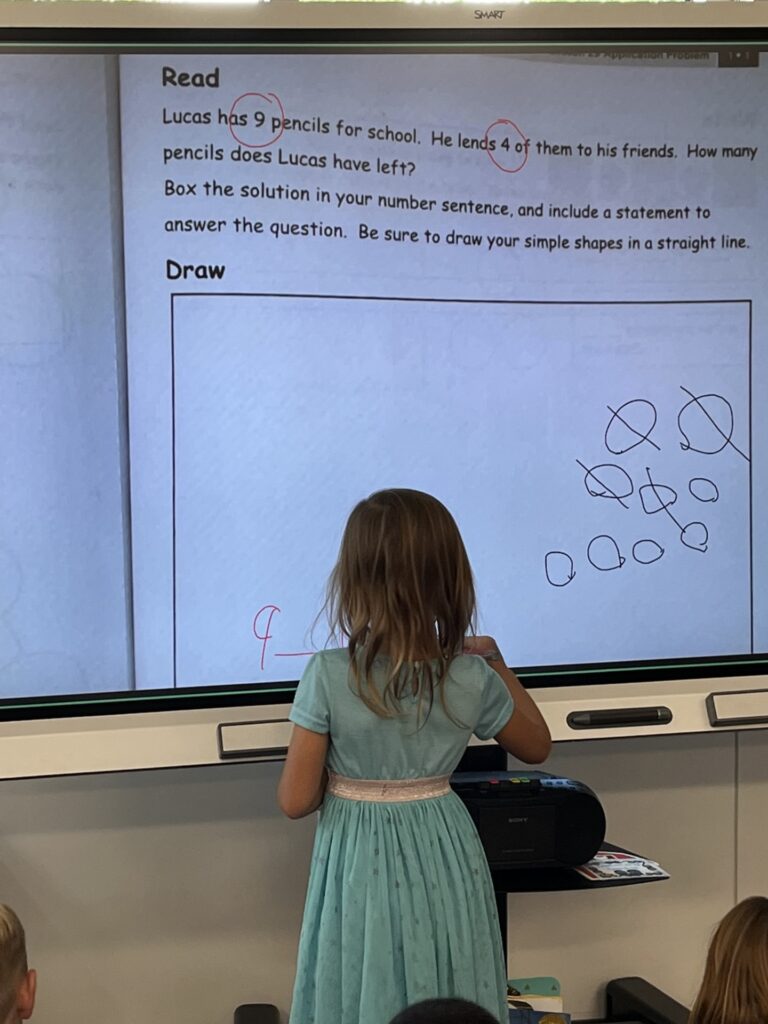
5.) Read Math Literature Daily
Math literature can bridge reading to math! By teaching them together your students can make FABULOUS connections! They can use the skills that you have taught them to draw on their whiteboard during the math story! We touch our schema and we say “Why is the story about math?”
The students are making an inference about why the story is about math and using their clues to write or draw their math problem on their whiteboard. When the story is over, they turn and show their neighbor what they drew on their board. I pick one student each day to show their board to the class. They LOVE this and are so engaged throughout the story!

6.) Use Fluency Pages/ Learn Pages as Independent Practice
Why not use the fact fluency pages or learn pages as an independent practice? You can copy the fluency pages on colored paper and have your students write on them with a dry-erase marker. I tell them to hold up their page when they finish, and then I can give them a bonus buck!
This really motivates them to want to finish the whole page and it’s great practice! You can also teach your students to use a 90-second sand time to time themselves to see how much they can do in that amount of time! Sand timers are so fun!

7.) Use Math Journals to Reinforce Your Skill
Math journals are probably one of my favorite parts of Math Workshop. I use these to see if my students “Got It”, and I pick the best one to show the class for 5 dollars! Whatever the skill is, I pick a math journal to go with it. I think it’s important for students to be able to see the same skill presented in a different way. Plus, but having them do a math journal, helps them with their fine motor skills for cutting and pasting. Sometimes I even give them stickers to show a story problem! So fun! If you’re interested in my Math Workshop Interactive Notebooks, click here.

8.) Use Math Tubs for Recursive Review
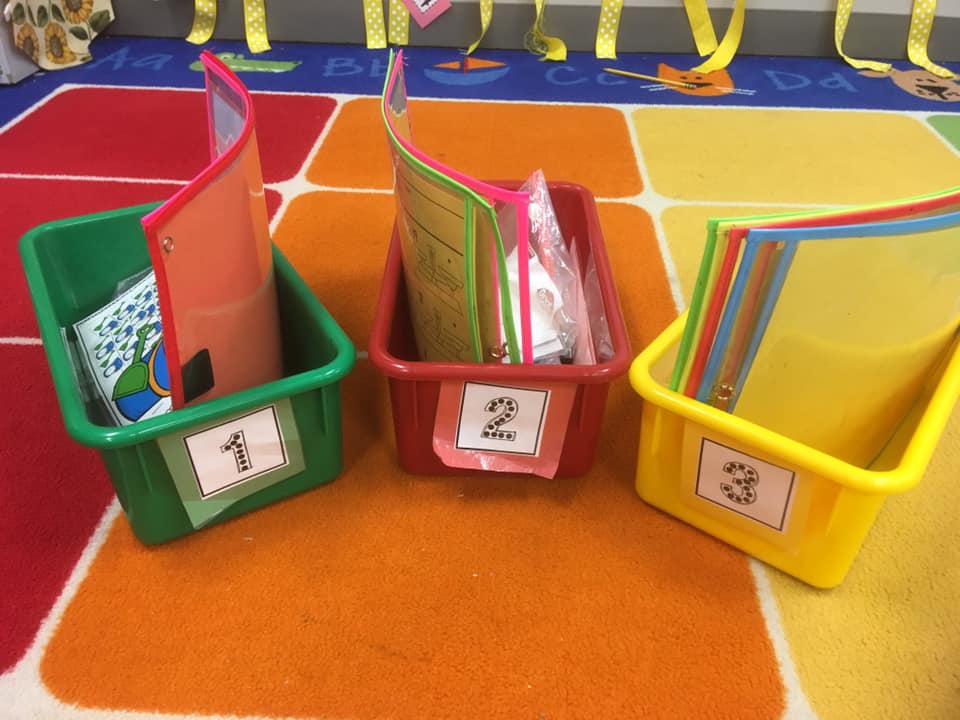
Have you ever thought about differentiating your math tubs? I use three different colored tubs: Green is below level, Red is on level and Yellow is above level. I use the data from my previous math assessments to assign my students their math tubs. I tell them that if they have the green sticker on their nametag, to play inside the green tub, the red sticker is for the red tub and the yellow sticker is for the yellow tub.
This really helps my students to practice the skills that they need. Especially for my lows and highs. It’s always good to see how they progress during the year. My goal is to have the kids in the green tub go to the red tub, and the red tub go to the yellow tub.
9.) Concept Development at the Teacher Table
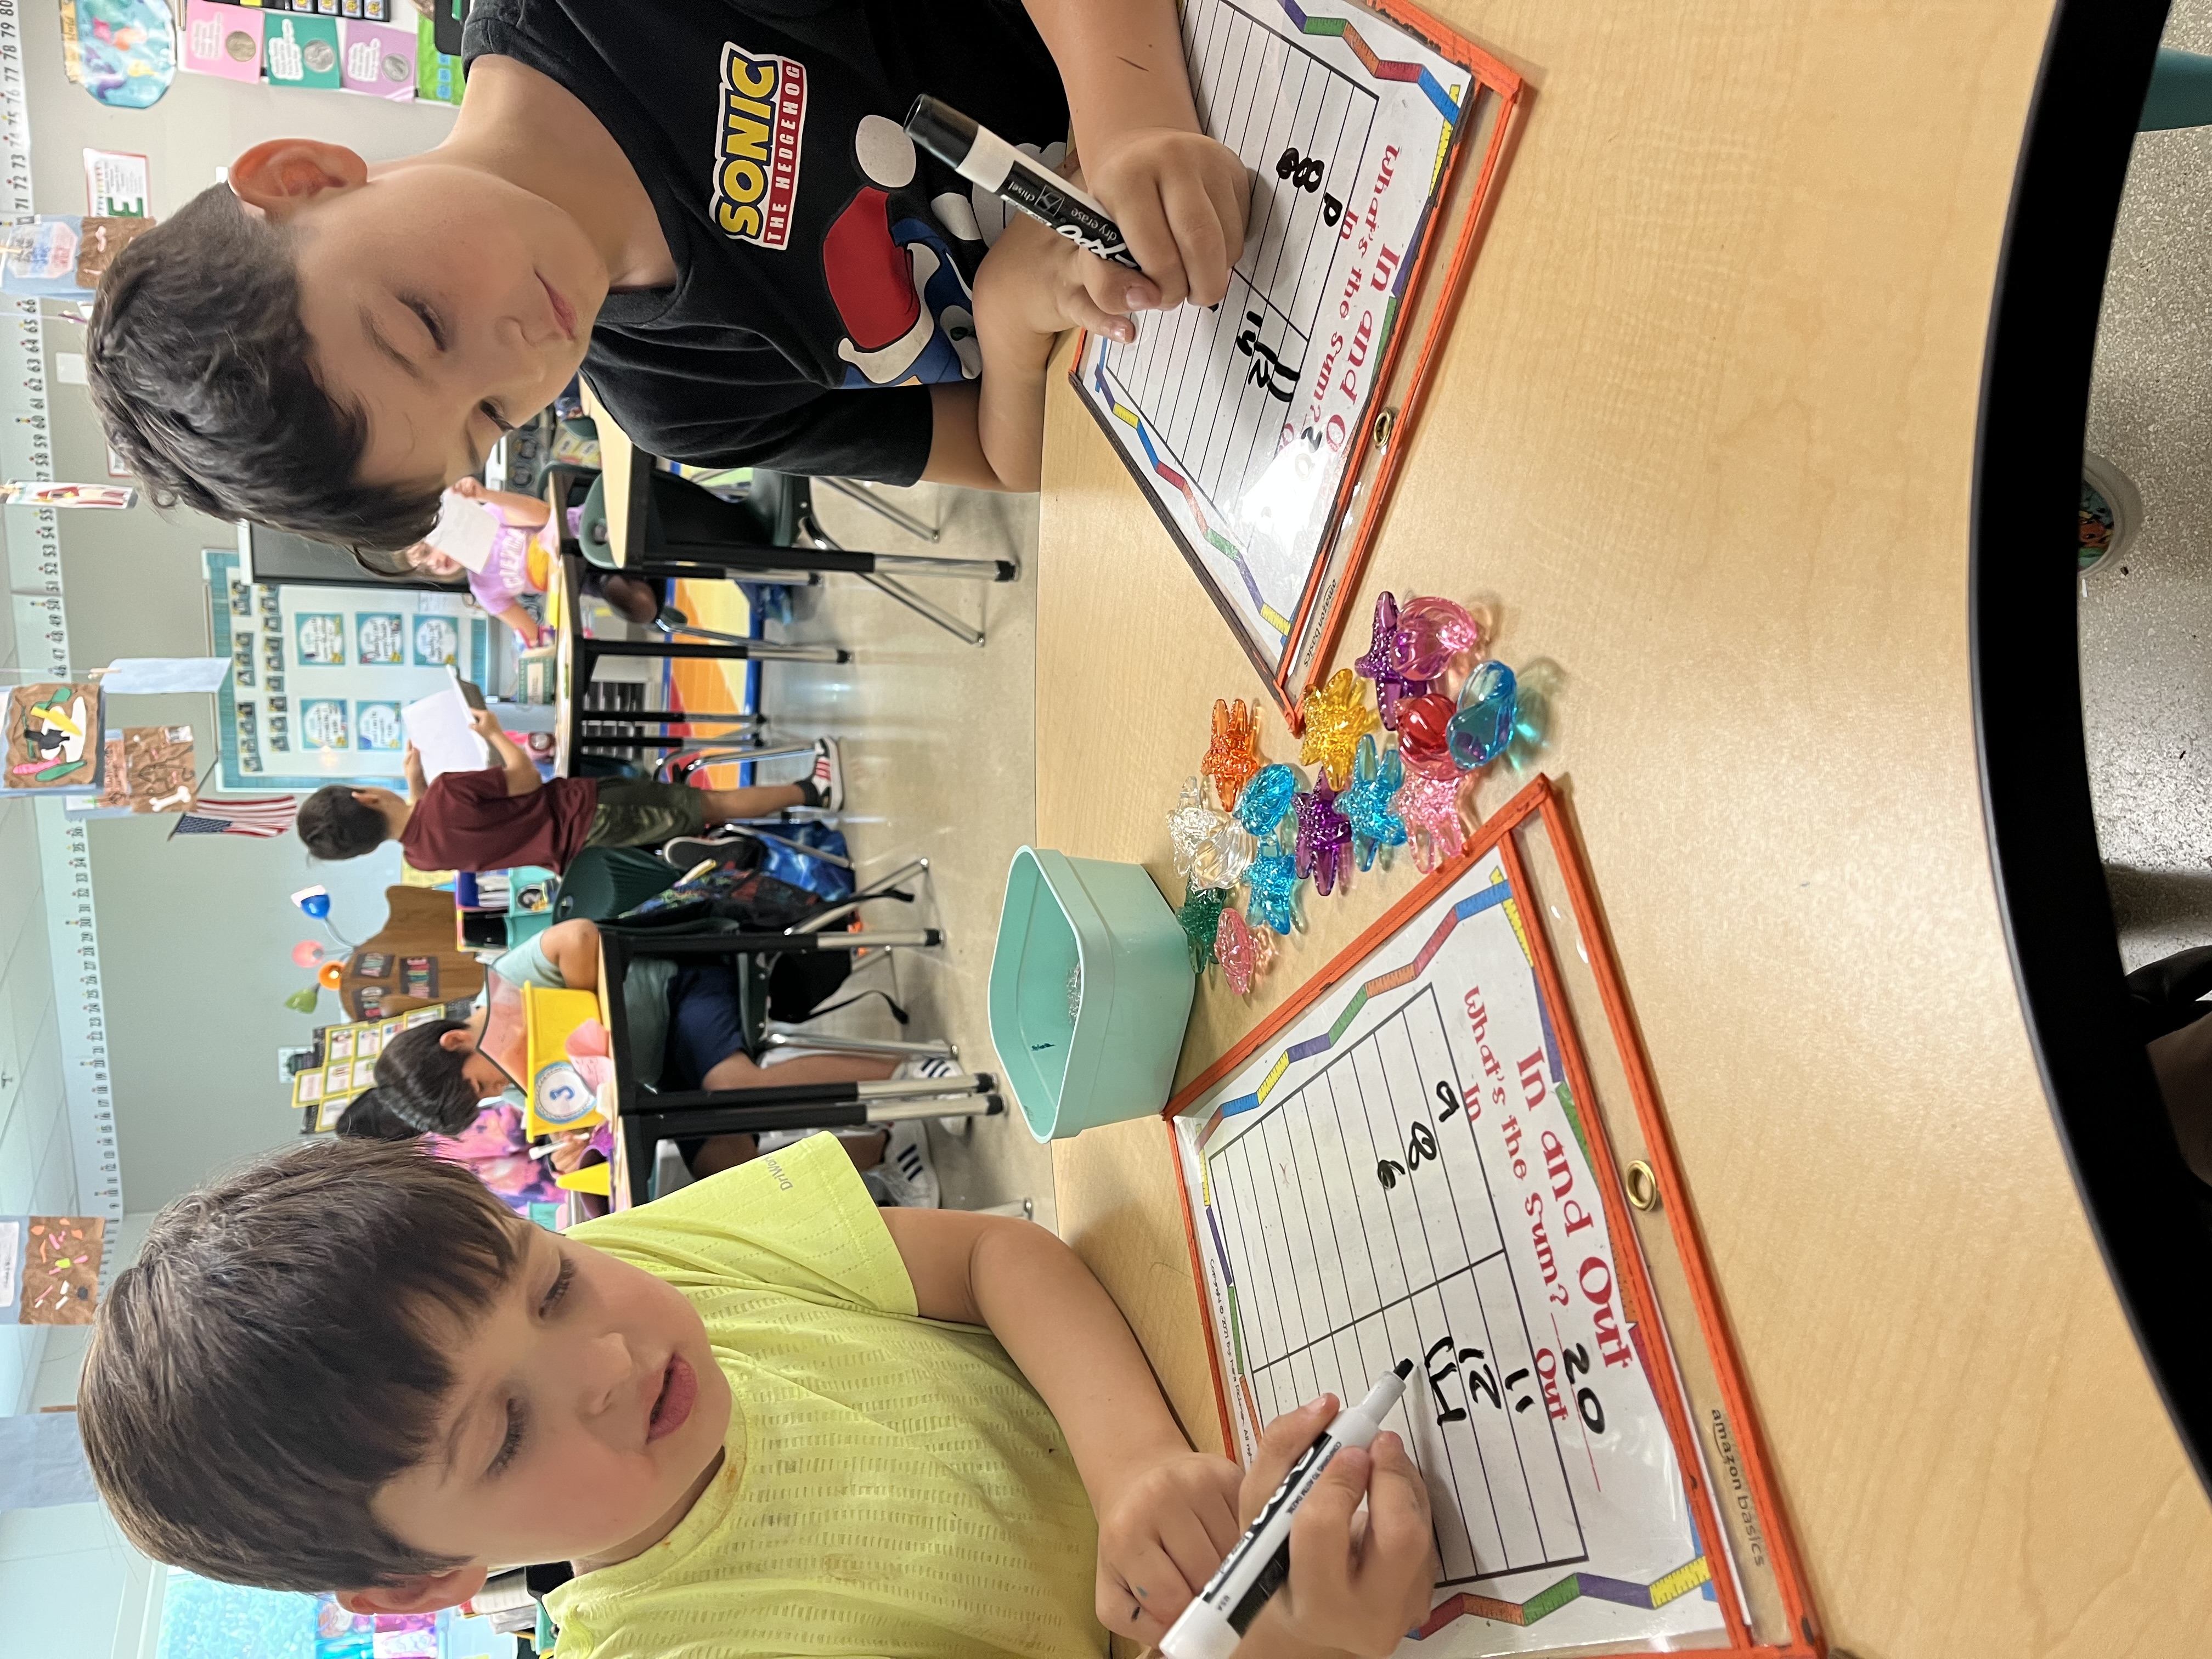
The concept development is usually about 30 minutes long, but I only do a part of it at my teacher table, since it was also taught during the mini-lesson. If the concept is to show part, part, or whole using counters, then I will have my students play “In and Out” which is the same concept, just in a different game. I try and make my teacher table as fun and engaging as I can using the same skill that the Eureka lesson has for the day. If you’re interested in checking out my math game “In and Out”, click here.
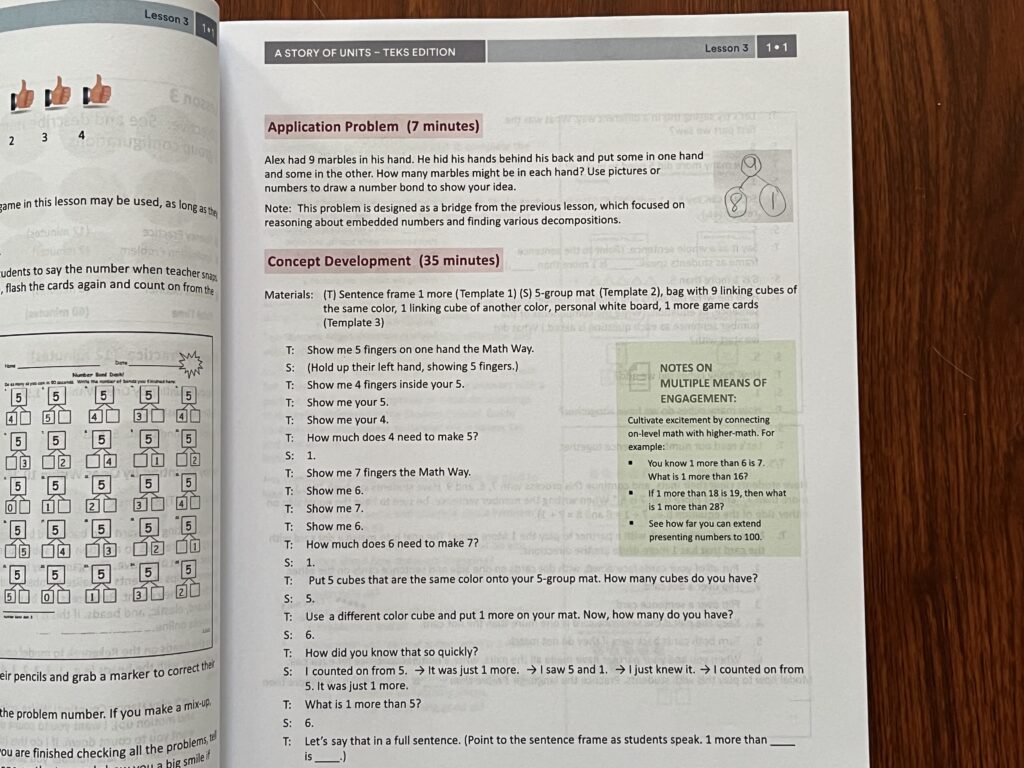
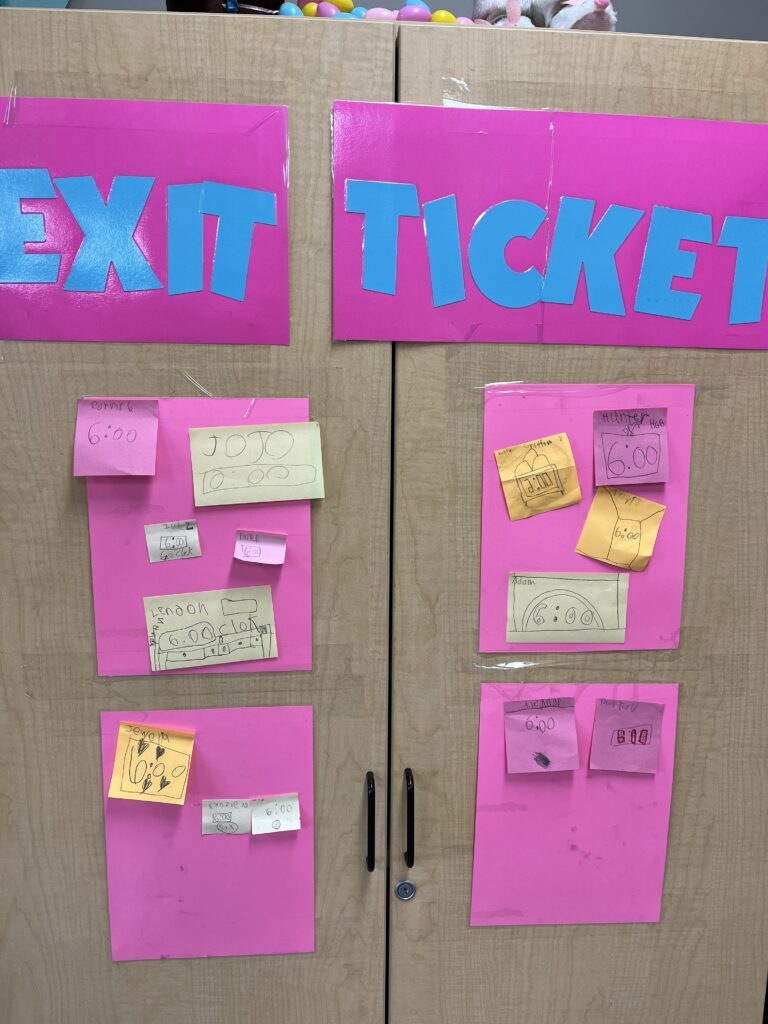
10.) Use the Exit Ticket as a Quick Glance
I LOVE using Exit Tickets as a quick glance to see who got it and who didn’t. I have a place in my room where my students can “Post” their answers using their Post-it notes. I have them write their name on the Post-it note, and then ask them a question to answer. I look over their answers at the end of the day and whoever didn’t get it, I will need to reteach them the following day at teacher table.
This is an easy way to quickly see who needs some differentiation. Also, if a student is always getting the answer correct, maybe they need to be challenged! You can have your students answer on Post-it notes, hold up their fingers, turn and tell, write on their whiteboard, or turn in an answer sheet. There are so many ways to do it!
In conclusion, integrating Eureka Math into your math workshop can transform your classroom into a dynamic and supportive learning environment. By aligning the curriculum with workshop components, leveraging its resources effectively, and embracing a student-centered approach, you’ll not only enhance mathematical understanding but also cultivate a love for learning among your students. So, gear up for an exciting journey of discovery and mathematical exploration in your workshop!
Did you get some great ideas today? I hope so!
Until next time…let’s take your classroom to the next level!

PS) If you’re interested in checking out another blog post on how to launch your Math Workshop, click here.

